
Sharing a bit of experience building a telegram bot with Serverless, AWS Lambda and TypeScript.
In this tutorial, we will explore how to build a simple Telegram bot using serverless with TypeScript and AWS Lambda. We’ll leverage the power of AWS services such as API Gateway and DynamoDB to create a highly scalable and efficient bot. While there are various tutorials available online, this guide aims to provide a more comprehensive and detailed approach. So, let’s dive in!
Setting Up the Server
To begin, we define a CloudFormation template using serverless that includes a single function serving as the entry point for our Telegram bot. This function, called “webhook,” resides in the index module and is responsible for handling incoming messages. TypeScript allows us to benefit from type safety, providing clear understanding of the event types passed from the API Gateway proxy into the Lambda function. Although TypeScript code may appear more verbose, it proves advantageous in the long run.
functions:
  webhook:
    handler: index.webhook
    events:
      - http:
          path: webhook
          method: post
This is the function entry in index.ts
export const webhook = async (
  event: APIGatewayProxyEvent
): Promise<APIGatewayProxyResult> => {
  const bodyParsed = JSON.parse(event.body!);
  console.log("bodyParsed", bodyParsed);
  // ...
}
Configuring DynamoDB
In addition to the server setup, we create a DynamoDB table to store our bot’s data. This table includes essential parameters and an index to facilitate efficient querying and content modification. While the complete list of attributes is not mentioned here, we focus on indexing for our specific use case of handling to-do items within the bot.
This is how the config looks in serverless.yaml
resources:
  Resources:
    ExampleDynamoDbTable:
      Type: 'AWS::DynamoDB::Table'
      DeletionPolicy: Retain
      Properties:
        AttributeDefinitions:
          -
            AttributeName: id
            AttributeType: S
          -
            AttributeName: chatId
            AttributeType: S
        KeySchema:
          -
            AttributeName: chatId
            KeyType: HASH
          -
            AttributeName: id
            KeyType: RANGE
        GlobalSecondaryIndexes:
          -
            IndexName: chatId-index
            KeySchema:
              -
                AttributeName: chatId
                KeyType: HASH
            Projection:
              ProjectionType: ALL
        BillingMode: PAY_PER_REQUEST
        TableName: ${self:provider.environment.DYNAMODB_TABLE}
The, for example in the TS side we can make operations on the DynamoDB table:
// Find all todos for this chatId
const r = await dynamoDb
    .query({
          ...params,
          KeyConditionExpression: "chatId = :chatId",
          ExpressionAttributeValues: {
            ":chatId": chatId.toString(),
          },
        })
        .promise();
if (r.Items == undefined || r.Items!.length == 0) {
    await bot.sendMessage(chatId, `0️⃣ No TODOs found`);
    globalResolve("ok");
    return;
}
let message = "";
for (const todo of r.Items!) {
    message += `➖ ${todo.what}\n`;
}
await bot.sendMessage(chatId, `? Current TODOs:\n${message}`);
Handling Telegram Messages
The entry point for our bot is the Lambda function responsible for processing incoming messages. To achieve this, we parse the message and chat ID from the message’s body. Leveraging the powerful “node-telegram-bot-api” package, we process the parsed message and send it to the bot for further handling. However, since we are using a Lambda function from AWS, we need to parse the message from Telegram and utilize the “processUpdate” function provided by the “node-telegram-bot-api” package. This sets off a chain of events that execute the bot’s commands.
const bot = new TelegramBot(token);

let globalResolve: (value: any) => void = () => {};

export const webhook = async (
  event: APIGatewayProxyEvent
): Promise<APIGatewayProxyResult> => {
  const bodyParsed = JSON.parse(event.body!);
  console.log("bodyParsed", bodyParsed);
  await new Promise((resolve, reject) => {
    globalResolve = resolve;
    bot.processUpdate(bodyParsed);
    // set timeout to 3 seconds to resolve the promise in case the bot doesn't respond
    setTimeout(() => {
      // make sure to resolve the promise in case of timeout as well
      // do not reject the promise, otherwise the lambda will be marked as failed
      resolve("global timeout");
    }, 3000);
  });

  // respond to Telegram that the webhook has been received.
  // if this is not sent, telegram will try to resend the webhook over and over again.
  return {
    statusCode: 200,
    body: JSON.stringify({ message: "function executed successfully" }),
  };
};
Notice that I’m using a global promise to hang until all the bot’s work is done. This is because Lambda will not wait for any async operations. The TelegramBot is an event queue so things happen out of sync. The bot handlers will resolve the promise and then the lambda will complete with a 200 status.
Implementing Bot Commands
We introduce various bot commands such as listing to-do items, adding new items, and removing existing ones. By following standard boilerplate code, we enable the bot to perform these actions. The complete code for these commands and additional functionalities can be found on GitHub for reference.
For example the /add command:
bot.onText(
  /\/add (.+)/,
  async (msg: TelegramBot.Message, match: RegExpExecArray | null) => {
    const chatId = msg.chat.id;
    const what = match![1];
    const id = randomUUID();
    try {
      await dynamoDb
        .put({
          ...params,
          Item: {
            id,
            chatId: chatId.toString(),
            what,
          },
        })
        .promise();
      await bot.sendMessage(chatId, `✅ Added TODO: ${what}`);
    } catch (error) {
      console.error(error);
      await bot.sendMessage(chatId, `❌ Error adding TODO: ${what} (${error})`);
    }
    globalResolve("ok");
  }
);
Note that I’m calling the global resolve to signal the finish of the bot’s work for this message and clear the Lambda run.
Deploying the Bot
With the server and bot code ready, we need to deploy the solution. Using the serverless framework, we run the deploy command, which sets up the infrastructure on AWS, including the Lambda function and API Gateway. After deployment, we obtain the HTTPS endpoint URL, which we need to configure as the webhook for our Telegram bot. This connection enables Telegram to send messages to our deployed bot.
$ ./node_modules/.bin/serverless deploy
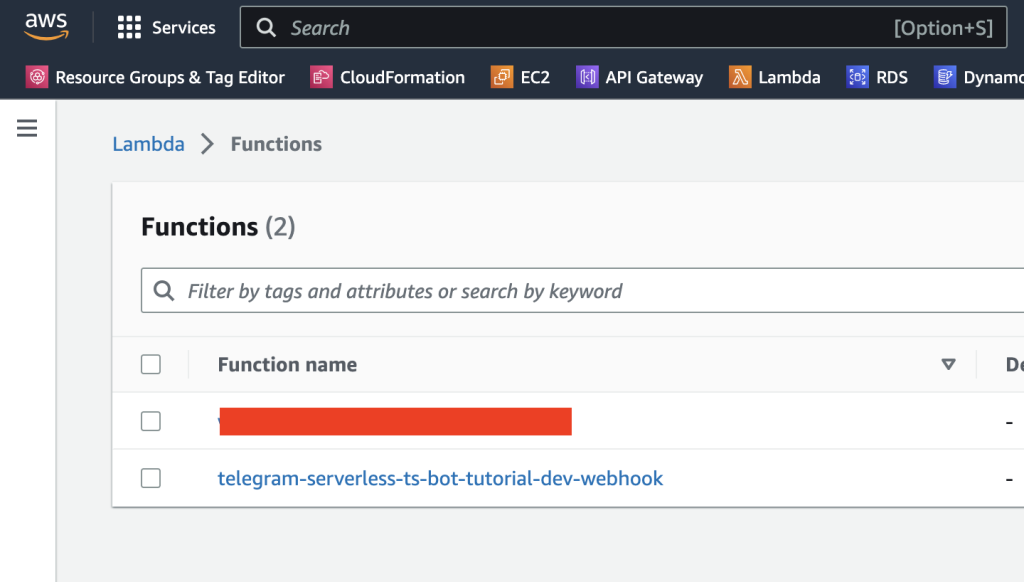
You can also watch your AWS account for the Lambda’s existence, as well as DynamoDB and the API Gateway.
You’re going to have to register your webhook with Telegram by running the following command:
curl --request POST --url "https://api.telegram.org/bot<BOT_TOKEN>/setWebhook" --header 'content-type: application/json' --data '{"url": "<URL>"}'
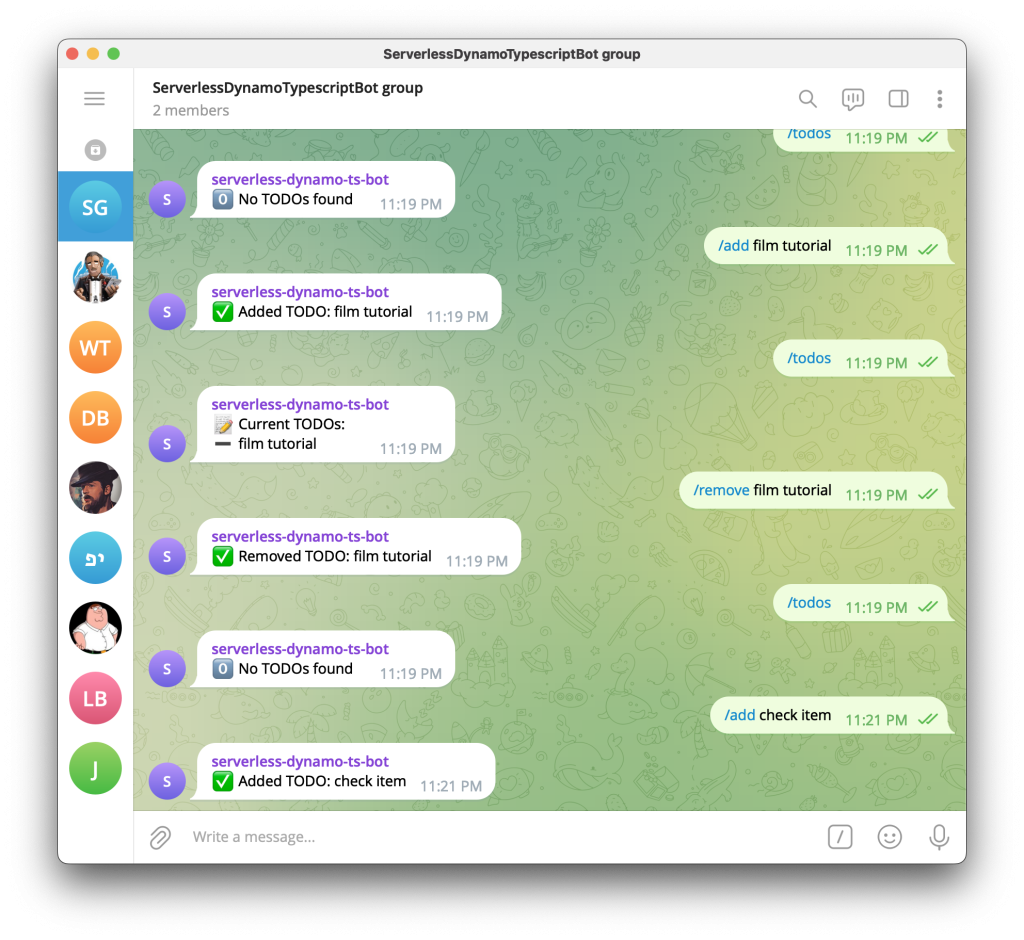
Use the URL that you received from serverless deploy for the POST endpoint. At that point the bot lambda should start receiving messages from Telegram.
Here’s proof:
Monitoring and Debugging
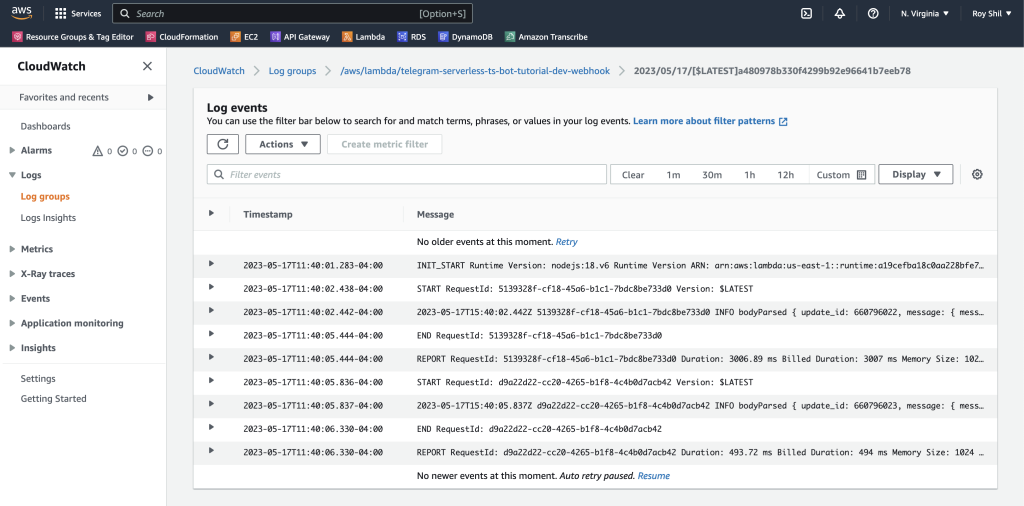
To monitor and debug our bot, we utilize various tools provided by AWS. CloudWatch allows us to view logs generated by our Lambda function, helping us identify any issues and understand the flow of data. Additionally, DynamoDB provides a handy interface to verify the stored data and perform tests on the bot’s functionality. Utilizing console logs and try-catch blocks for error handling and logging ensures a smooth debugging experience.
Cloudwatch: (all console.logs from your code will appear as lines there)
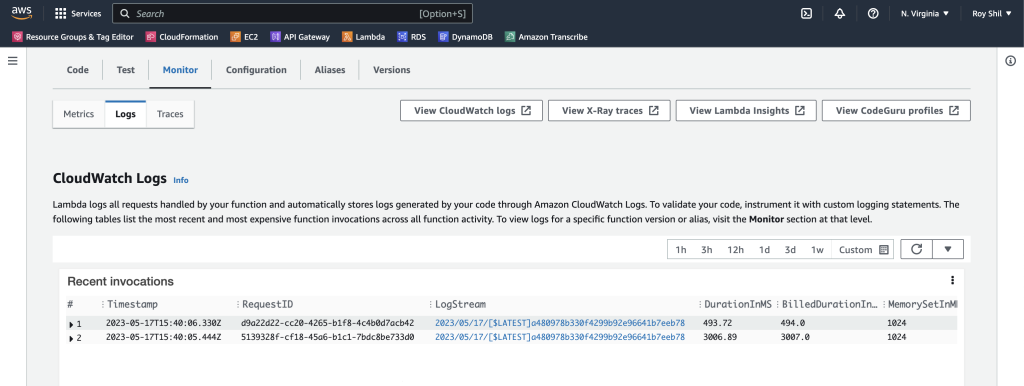
The Lambda itself will also show the invocations:
Conclusion
By following this tutorial, you’ve learned how to build a serverless Telegram bot using TypeScript and AWS Lambda. Leveraging AWS services like API Gateway and DynamoDB, we’ve created a scalable and efficient bot infrastructure. TypeScript’s type safety provides clarity in handling events, while the “node-telegram-bot-api” package simplifies interaction with Telegram’s API. With the power of AWS and the ease of TypeScript, you can create sophisticated bots tailored to your requirements. The complete code and instructions for this project are available on GitHub, allowing you to start building your own bot right away. Happy bot building!